We all deserve glowing, healthy skin. But what if you could treat yourself to a spa-quality facial—without leaving your house or spending a fortune? This 7-step guide will show you how to give yourself the perfect at-home facial that feels indulgent and leaves your skin radiant. No fancy machines, just smart skincare with real results.
Why Do an At-Home Facial?
Let’s be real—life is busy, spas are pricey, and sometimes, you just want to wear your robe and still get pampered. At-home facials are cost-effective, convenient, and customizable. Plus, doing it regularly can help unclog pores, improve skin tone, boost circulation, and relax your mind (hello, self-care Sunday!).
What You’ll Need Before You Start
Basic Tools & Supplies
- Clean towels
- A gentle cleanser
- Exfoliant (physical or chemical)
- Steamer or bowl of hot water
- Face mask
- Toner
- Serum
- Moisturizer
- Optional: facial roller, mask brush, extractor tool
Optional Add-ons for Luxury
Want to level up? Add a few extras like essential oils, soothing music, or even a jade roller. Aromatherapy and ambiance go a long way when recreating a spa experience at home.
Step 1: Cleanse Your Skin
A facial always starts with a clean canvas. Use a gentle cleanser suited for your skin type to remove dirt, oil, and makeup.
Double Cleansing: The Gold Standard
Start with an oil-based cleanser to dissolve makeup and sunscreen. Follow it up with a water-based cleanser to get rid of impurities. Trust me, your pores will thank you.
Step 2: Exfoliate Gently
Exfoliation sloughs off dead skin cells, revealing that fresh, baby-soft skin underneath. But here’s the catch—don’t overdo it!
Physical vs. Chemical Exfoliants
- Physical exfoliants use small grains or brushes to scrub away dead cells.
- Chemical exfoliants (like AHAs/BHAs) use acids to gently dissolve them.
Each has its pros. Choose based on your skin’s sensitivity and goals.
How Often Should You Exfoliate?
Once or twice a week is plenty. Over-exfoliating can cause irritation, redness, and even breakouts. Your skin should feel refreshed—not raw.

Step 3: Steam to Open Pores
This is where the magic happens. Steaming softens skin, loosens debris in pores, and boosts circulation.
DIY Steaming Methods
- Boil water and pour it into a bowl.
- Drape a towel over your head and lean over for 5–10 minutes.
- Add herbs like chamomile or green tea for extra benefits.
Be careful—not too hot, and not too long!
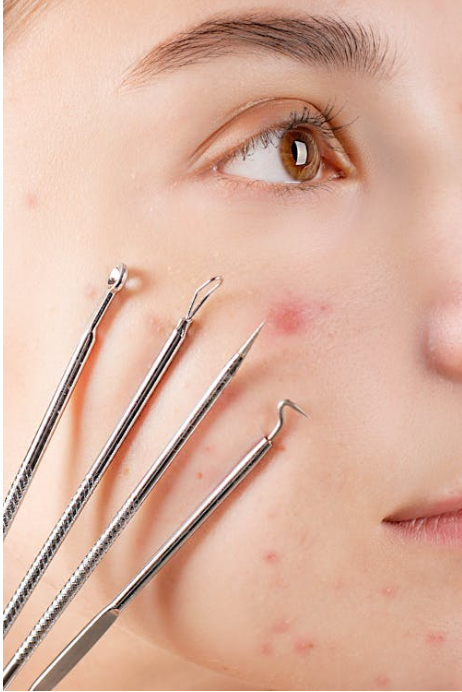
Step 4: Extract (If Necessary)
Extractions help remove blackheads and whiteheads, but proceed with caution.
Safe Extraction Techniques
- Wrap your fingers in tissue.
- Gently press around the blemish—never squeeze.
- Use a comedone extractor only if you’re experienced.
When to Skip This Step
If your skin is inflamed, sensitive, or you’re unsure how to extract properly, skip it. You don’t want to cause more harm than good.
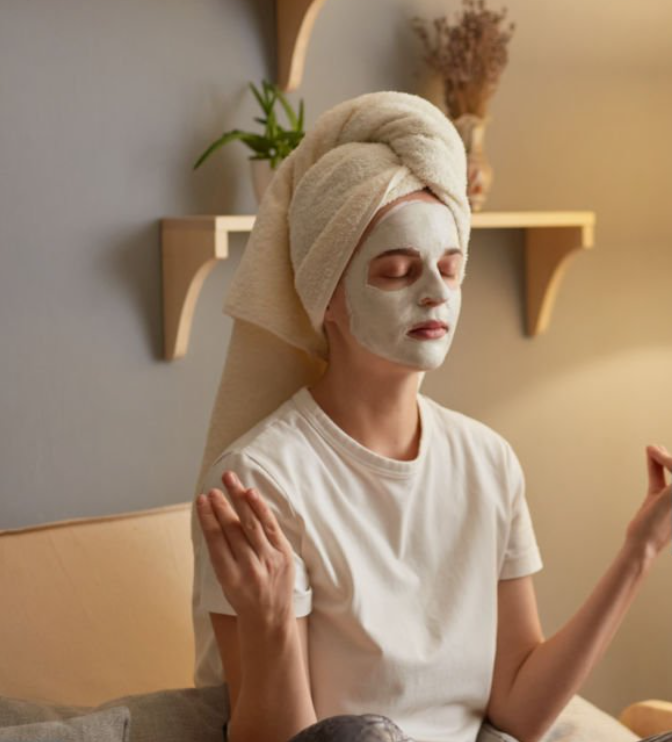
Step 5: Apply a Face Mask
Now that your pores are open, it’s time to treat your skin. Face masks can hydrate, purify, or calm depending on your needs.
Choosing the Right Mask for Your Skin
- Dry skin? Go for hydrating masks with hyaluronic acid.
- Oily skin? Clay or charcoal works wonders.
- Dull skin? Brightening masks with vitamin C are your BFF.
Natural DIY Mask Ideas
- Oatmeal + honey for calming redness
- Avocado + yogurt for nourishment
- Turmeric + yogurt for brightening
Step 6: Tone and Treat
Toning balances your skin’s pH and preps it for the good stuff—serums.
The Purpose of Toner
Toners remove any leftover residue and help tighten your pores. Look for alcohol-free formulas with soothing ingredients like rose water or witch hazel.
Serums That Make a Difference
Pick a serum tailored to your skin concern:
- Vitamin C for brightness
- Niacinamide for pores
- Hyaluronic acid for hydration
- Retinol (night use only) for anti-aging
Step 7: Moisturize and Massage
Time to lock it all in. Moisturizer seals the deal and facial massage boosts blood flow, helping your skin absorb everything better.
Lock in the Benefits
Choose a rich moisturizer if your skin is dry, or a lightweight gel if you’re oily. Don’t forget the neck!
Facial Massage Techniques
- Use upward strokes with your fingers or a facial roller.
- Focus on pressure points near your temples, jawline, and cheekbones.
- Keep it gentle—this is a facial, not a face wrestle.
Post-Facial Tips for Glowing Skin
What to Avoid After a Facial
- Don’t apply heavy makeup right away.
- Skip exfoliating for a few days.
- Avoid sun exposure—your skin is extra sensitive.
Stick to a gentle routine and drink lots of water to maintain that glow.
Conclusion
An at-home facial doesn’t have to be complicated or expensive—it just needs the right steps and a little consistency. Think of it as pressing the reset button for your skin. Whether you’re prepping for a special occasion or just indulging in self-care, these 7 steps will help your skin look its best—and make you feel pampered in the process. So go ahead, grab your towel and let your inner esthetician shine.
FAQs
1. How often should I do an at-home facial?
Once every 1–2 weeks is ideal. It gives your skin time to recover and see real results.
2. Can I skip steaming if I don’t have time?
Yes, but steaming really helps open pores and prep skin for deeper cleansing. Try a warm compress instead.
3. What if I don’t have a face mask?
You can make simple DIY masks using ingredients like honey, oatmeal, or yogurt. No excuses!
4. Is it okay to use more than one serum?
Absolutely! Just layer them from thinnest to thickest, and avoid ingredient conflicts (e.g., don’t mix vitamin C with niacinamide unless the product is formulated for it).
5. Why is my skin red after the facial?
Mild redness is normal due to increased blood flow, but if it persists or stings, you may have over-exfoliated or used a product that irritated your skin.